Background
ZoomInfo InboxAI (formerly Komiko‘s) custom objects, custom fields and Visualforce widgets can only be accesses by the selected Salesforce profiles. It allows the Salesforce admin to fully control who can see what. Please note that even though Komiko’s name changed to InboxAI, Komiko Ids, objects and fields still use Komiko.
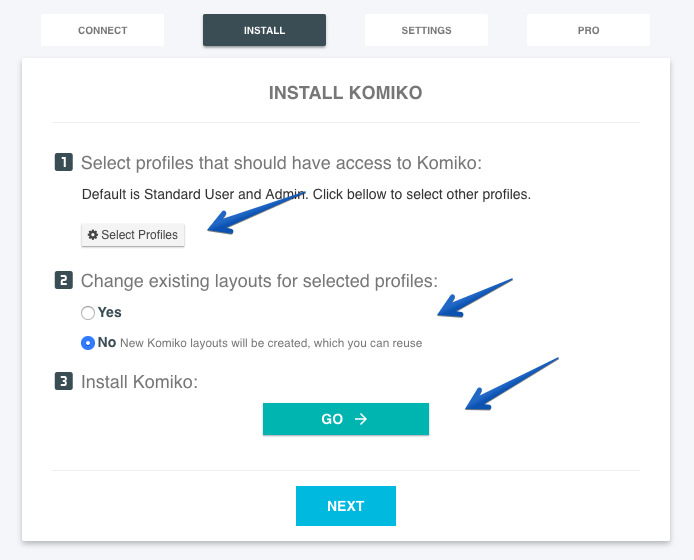
Step 2 <Install> in the installation wizard allows you to select the sub-set of profiles that should be enabled. Click on the <Select profiles> button and you can easily add more profiles or remove existing ones. Please click <Save> when you are done with your selection.
Komiko also allows you to automatically update the relevant pages with Komiko’s default info. As an example, adding the Komiko’s Visualforce widget to the accounts and opportunities pages.
You can decide to either let Komiko do it automatically (choose yes) or do it yourself (choose no) using Salesforce page layout edit.
In order to update Salesforce with the new profile selection you’d need to click <Go>, which will make Komiko’s info available for these profiles. The update takes few minutes.
Adding or removing profiles
You should follow the steps described above. Go to the <select profiles> and select/de-select profiles and <save>. Now you can either let ZoomInfo InboxAI update the page layouts automatically or choose the manual way.
The automatic update will update all profiles, not only the newly added.
So use the automatic update only if you have not changed the modifications applied automatically by ZoomInfo InboxAI. If you made some changes the automatic update will override them and revert to the default.
Leave A Comment?