There are two main steps:
- Create a new Visualforce page
- Modify the required layout to embed the new Visualforce page
1. Create a new Visualforce widget
Navigate to setup and search for Visualforce pages.
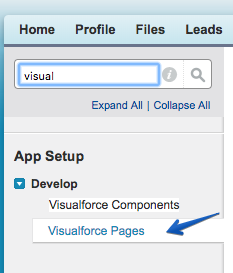
You’ll get a list of all Visualforce pages. Click <New> to create a new Visualforce page.

Name the new visualforce page e.g. ZoomInfo InboxAI Engagement Insights. Make sure that the technical name does not have spaces.
Delete the default Apex code and paste the following:
<apex:page standardController="Account" tabStyle="account" >
<div>
<apex:form >
<apex:pageblock >
<div>
<apex:iframe src="https://www.inboxai.zoominfo.com/dashboard/account/{!account.Id}/external/activitycharts?embedded=true&UserId={!$User.Email}" height="650px" width="100%" scrolling="false" />
</div>
</apex:pageblock>
</apex:form>
</div>
</apex:page>

You are now done with creating the visualforce page.
2. Embed the new Visualforce page in an existing layout
Go into <Edit layout>. It is available at the top right corner of every Salesforce layout.
2.1 Create a new section and drag it to the right place
Start by creating a new section.

Give it a name e.g. ZoomInfo InboxAI Engagement Insights. Check the 1-columns layout and detail page only. And click [OK].
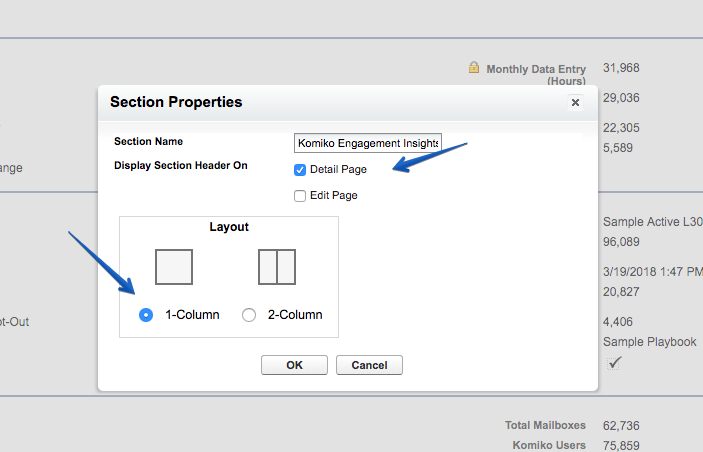
Drag the section to its right place in the layout.
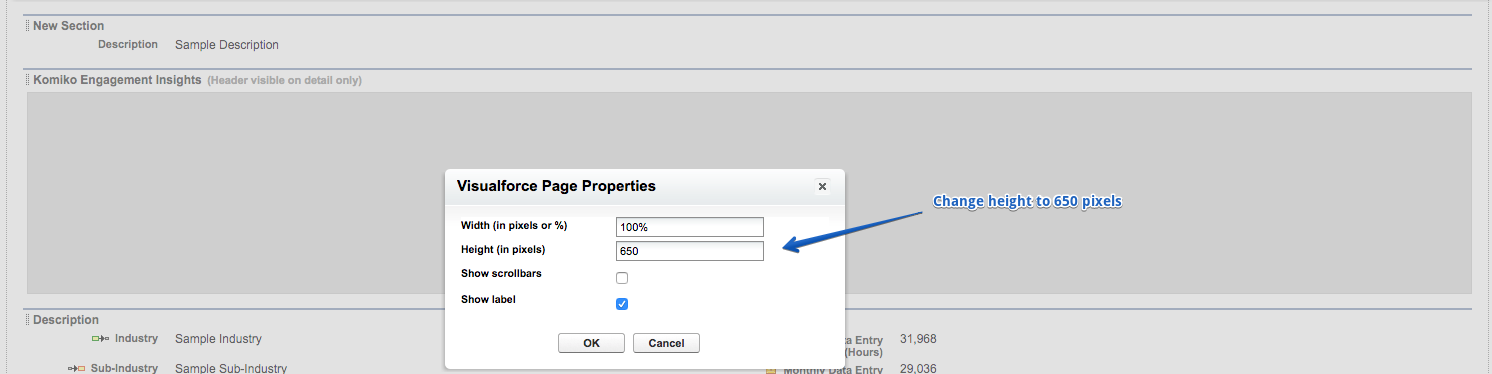
2.2 Drag the Visualforce page to the right place
Now navigate to the Visualforce section.

Pick the new Visualforce page and drag it into the section you just created.

Change the height of the page to 650 pixels and press [Ok]. Getting to the settings require clicking on the wrench icon at the top right corner.
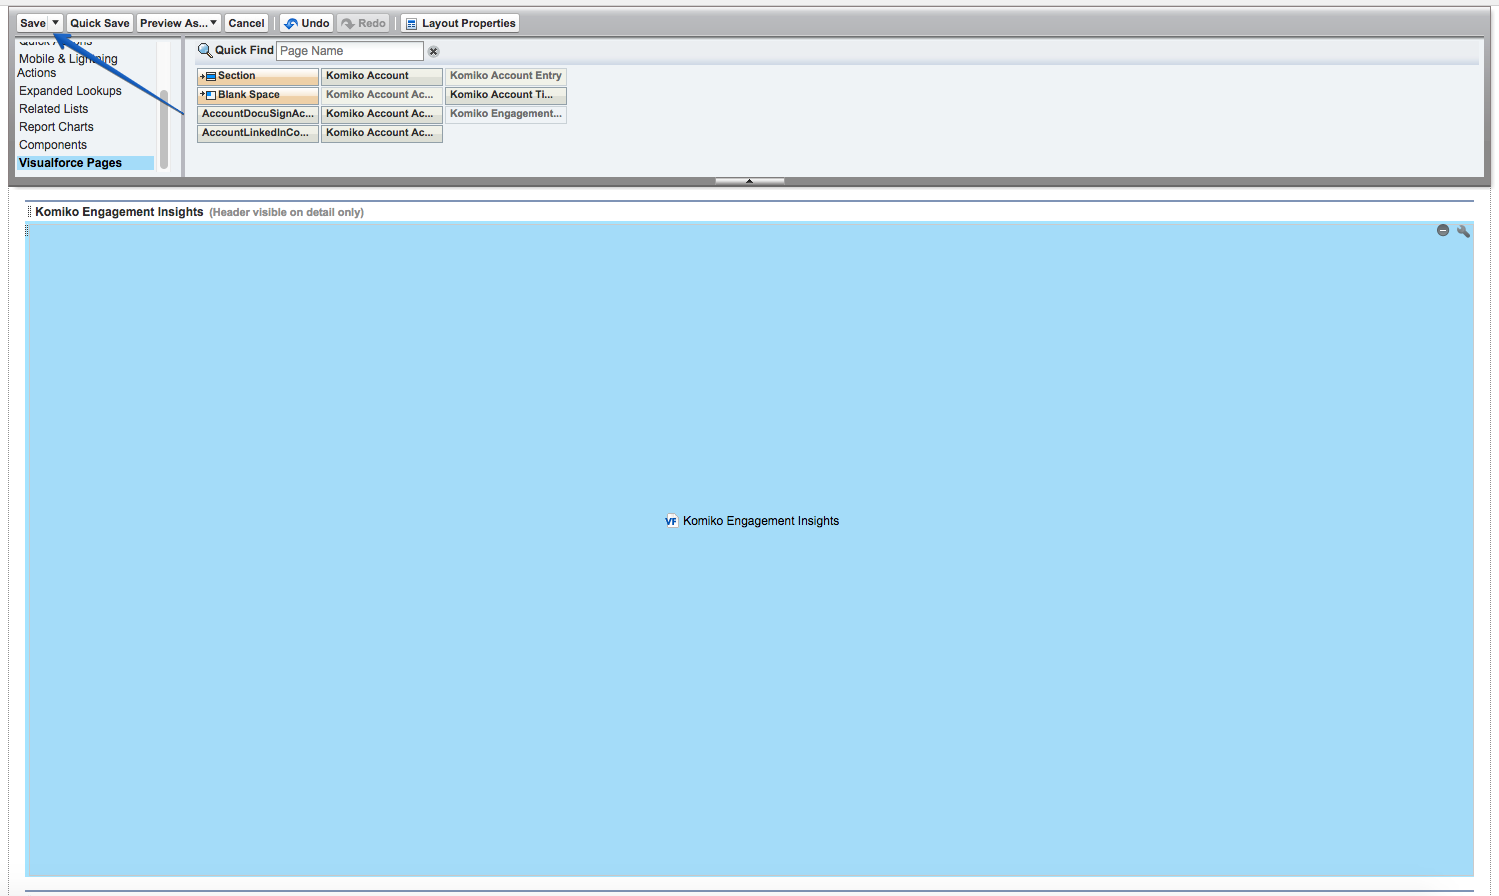
And the very last step is saving it.
Leave A Comment?