1. Introduction
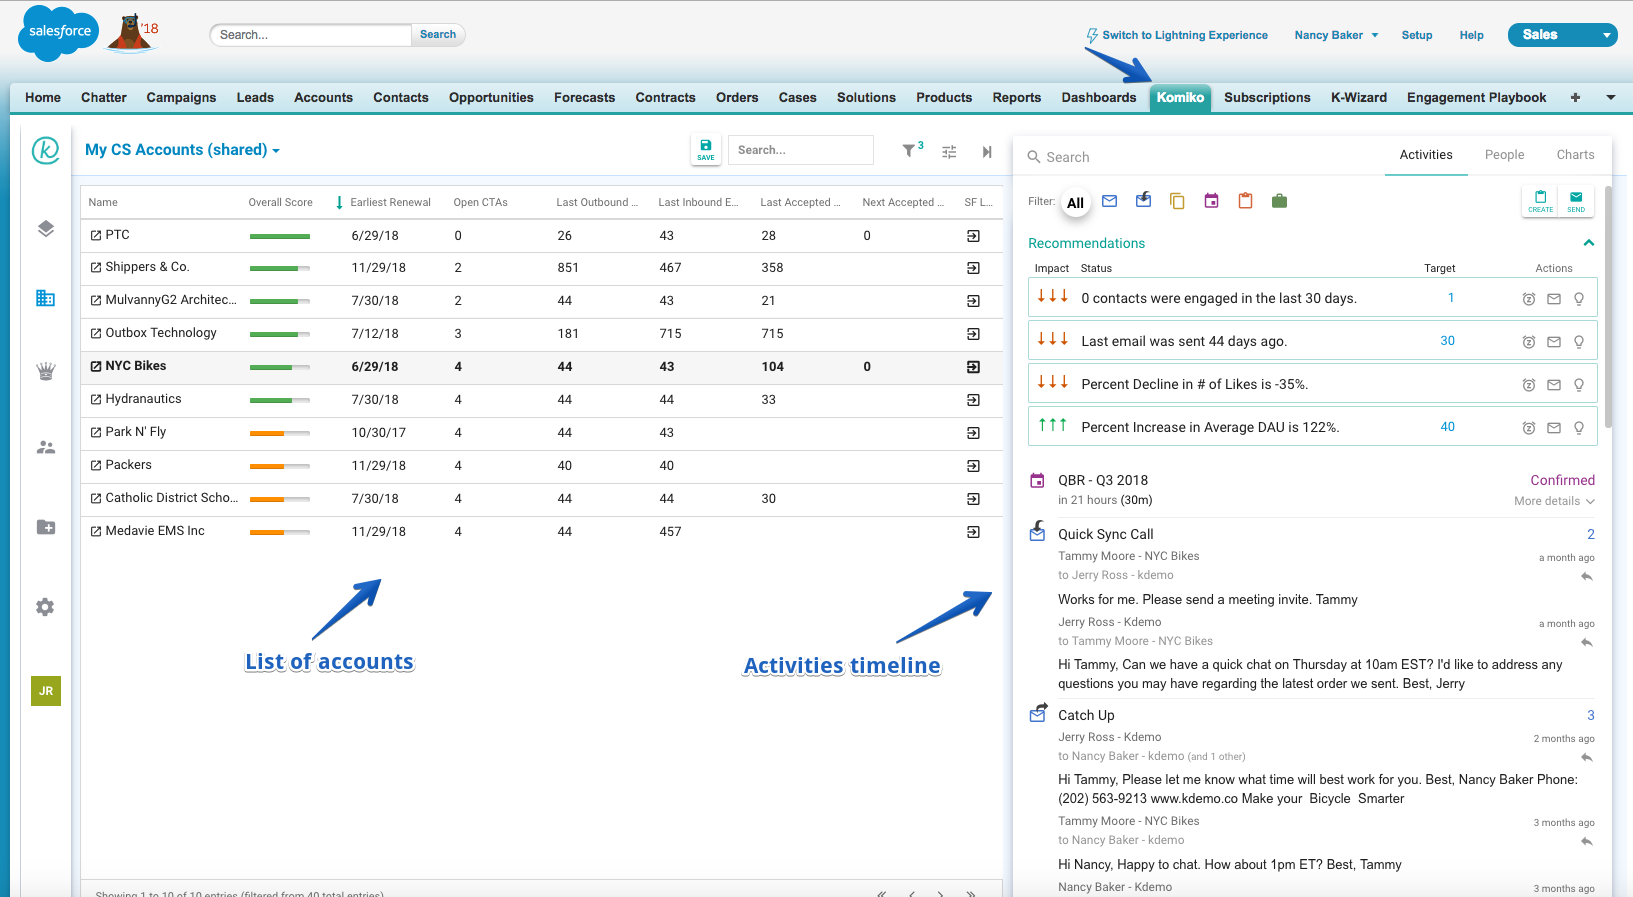
ZoomInfo InboxAI (formerly Komiko) helps Account Managers and Customer Success Managers to be on top of their accounts. It provides the following information:
- Health score
- Last interaction dates
- Other important information from the account like total opportunities amount, product usage metrics, etc.
- Recommended call-to-action (based on playbooks)
- Full visibility into all interactions that have held with each account. It includes all emails, meetings, attachments exchanged with anyone from your company and this account. It’ll also show call logs, customer service cases, and any other Salesforce task.
The dashboard can be accessed from a Salesforce tab (instructions for setting it up) or directly by typing https://www.inboxai.zoominfo.com/dashboard/accounts
2. List view management
The dashboard allows you to define several list views. Each one will have a different set of columns (fields) as well as different filters. Each list view can be <Shared> or non shared. Shared means that it’ll be visible by all users, versus non-shared will only be visible to the user that created it.
The concept of the list view as well as its maintenance is very similar to Salesforce list views both in Classic and Lightning UI.
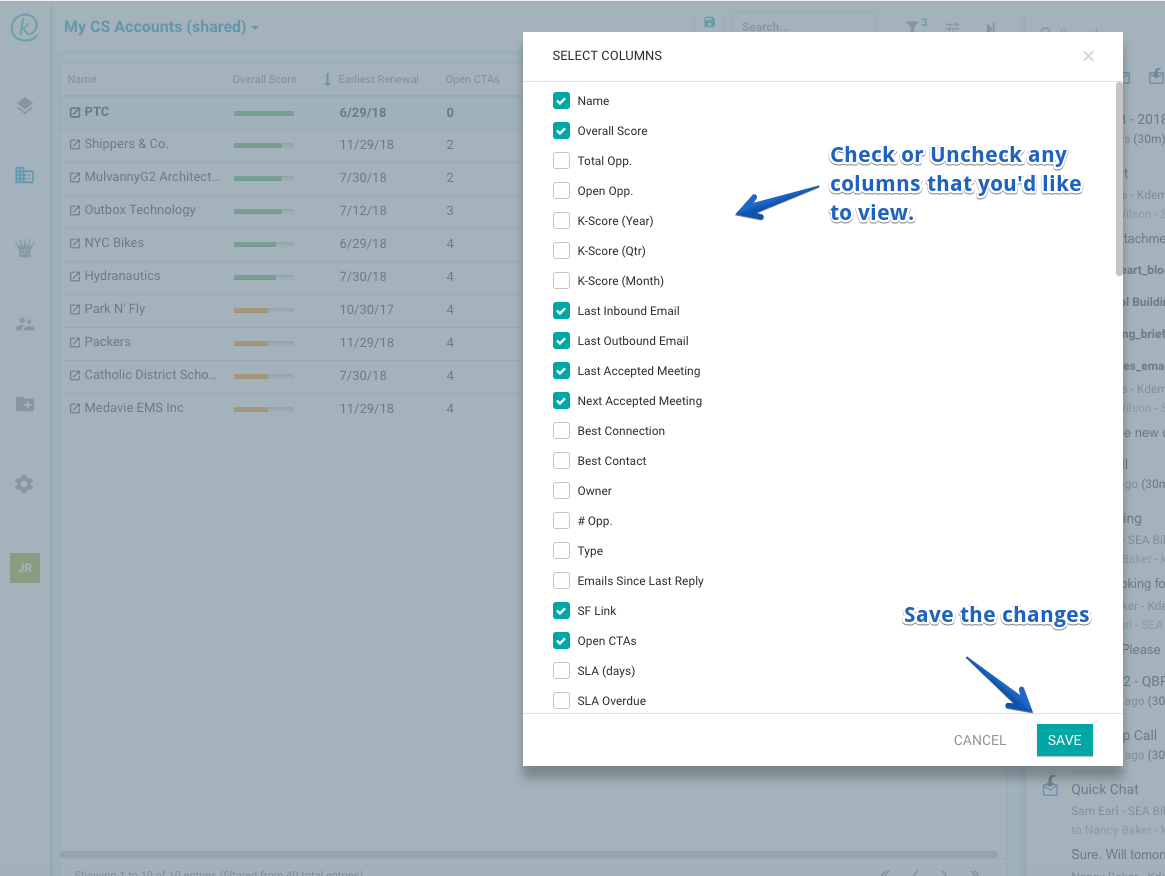
2.1 Add and remove columns (fields)
Choose the setting icon and from it click on <Select Columns>.

You’ll then be able to check un-check the columns that you’d like to have in your list view.
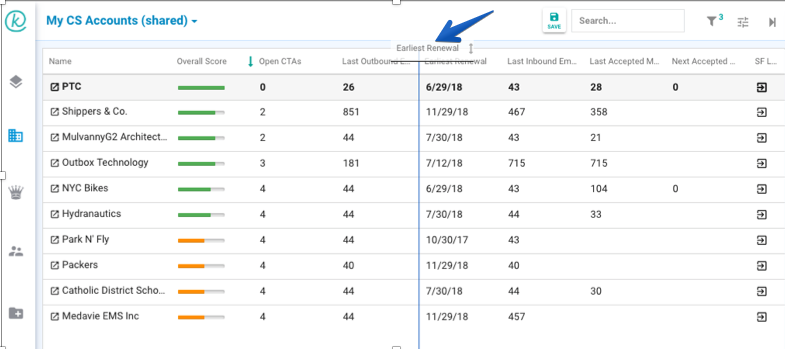
2.2 Reorder columns
Reordering the fields is done by dragging fields from their original position to the target location.
You may want to make ad-hoc changes and then revert to the previous settings or you’d like to make these changes added to the list view. If you’d like it to update the list view you’d need to also click the <Save to List view> button.
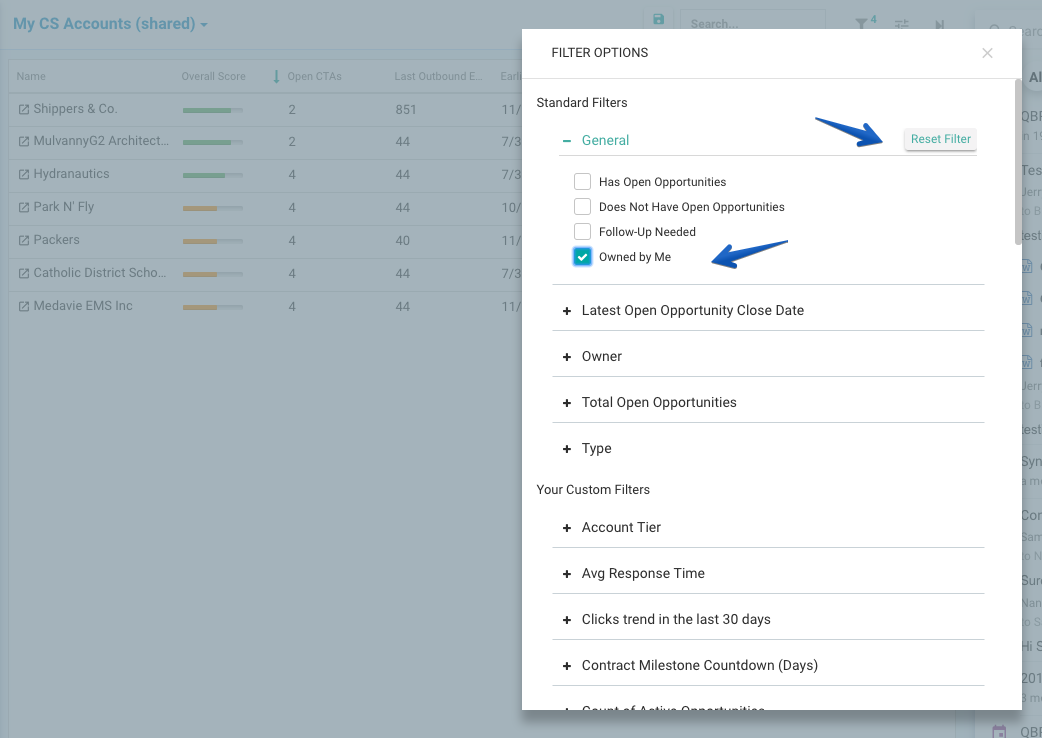
2.2 Change filter definition
Click on the <Funnel> icon to make changes. The number of filter items used is shown next to the icon in this example, 3.

In the filter dialog you’ll be able to change existing filters or add new ones. When a new filter is added, in this case (owned by me) a button will be shown allowing you to reset all filter items related to a section.
You may want to make ad-hoc changes and then revert to the previous settings or you’d like to make these changes added to the list view. If you’d like it to update the list view you’d need to also click the <Save to List view> button.
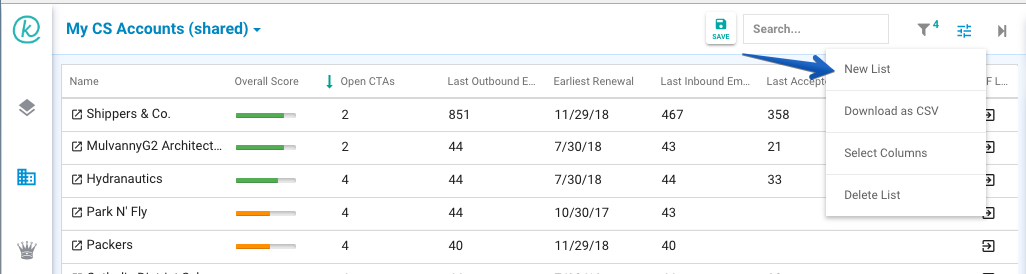
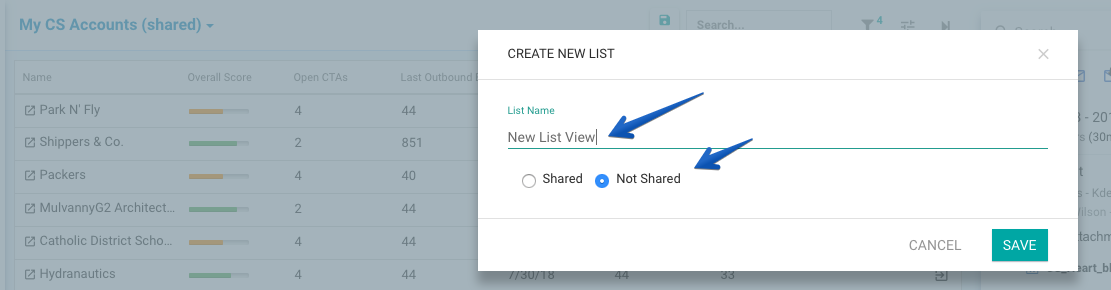
2.3 Create a new list view
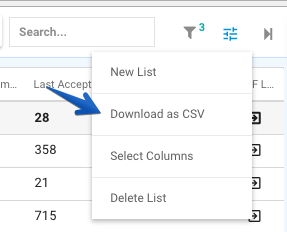
Choose the <New list> option.
Name the list view and pick <Shared> vs <Non-Shared>. Shared can only be created by users with Admin rights. Shared views will be available for the entire team, but will only Admin will be able to make changes that will be shared. Other users can still make ad-hoc changes and in a second stage clone the share view to their non shared space.
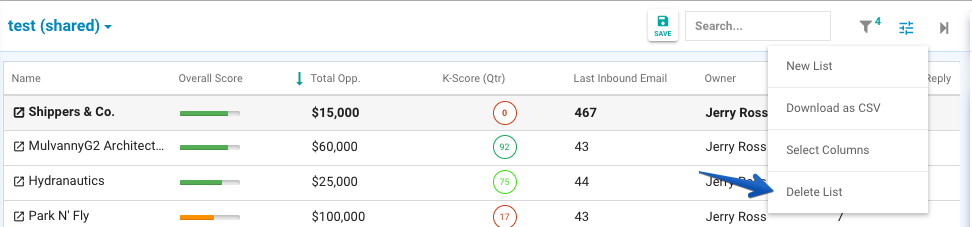
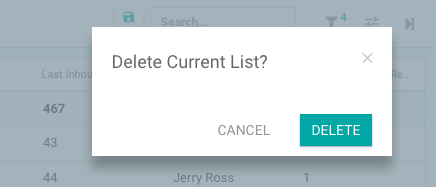
2.4 Delete a list view
To delete a list view click on <Delete view>
You will be prompted with a confirmation dialog.
2.5 Download as a CSV
Just click on <Download as CSV>.
3. List view in action
The columns (fields) available for list view includes ZoomInfo InboxAI‘s proprietary fields along with Salesforce fields. It is easy to make more Salesforce fields (standard and custom) available for the dashboard.
Here is a description of some of ZoomInfo InboxAI‘s proprietary fields:
- Compliance health score – calculated based on the number of call-to-action items (items that are not compliant with the playbook) divided by the total number of playbook items for this account.
- Prediction health score – when analyzing historical data and applying ZoomInfo InboxAI‘s AI model, it can predict account health e.g. likelihood to churn or expand quite accurately .
- K-Score – Engagement score with this account. It is using the number of interactions by type (meetings, emails received, sent) along a time period applying a decay logic for older interaction.
- Days since last…inbound, outbound, meeting – Information about number of days since last inbound, outbound, meeting and time to next meeting.
- Best contact – Identifying the person in the account that is the most engaged.
- Link back to Salesforce UI – Navigate directly to the Salesforce account page.
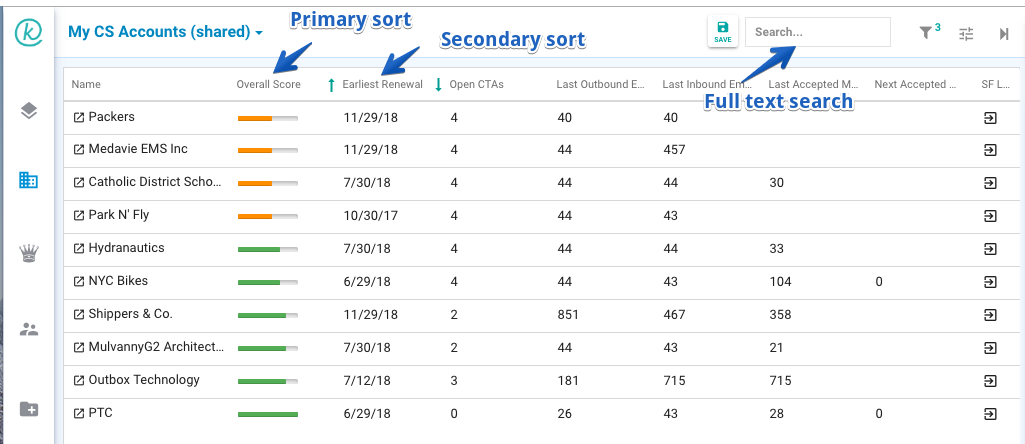
3.2 Search and sort
You can use the search box to search across all accounts. And you can sort the list by any field. Clicking on the <Shift> button and then clicking on a different column will sort this column secondary.
3. Timeline section
The timeline section includes three main sections

3.1 Call-to-Action Recommendation
Each account can have between no Call-to-Actions (CTAs) to several of those. Each CTA represent a playbook item that is not in compliant for this account. When the AI prediction model is used it will also provide explanations to the prediction score which may be outside of the playbook definition.
The following examples show two CTAs that are derived from playbook engagement metric. The number of contacts that are engaged in 30 days time period should be at least 1. For this account it is 0. The account owner should take an action e.g. email, call, visit to get at least one contact engaged. The last two items are product usage data that can also trigger CTAs.
The recommendation section can be collapsed to provide more vertical space for the timeline, by clicking on the ^ at the top right corner.

3.2 Activities
The activities timeline includes all activities that are related to this account including:
- Emails
- Meetings
- Attachments
- Call log
- Salesforce tasks
- Customer service cases
- Changes made to opportunities
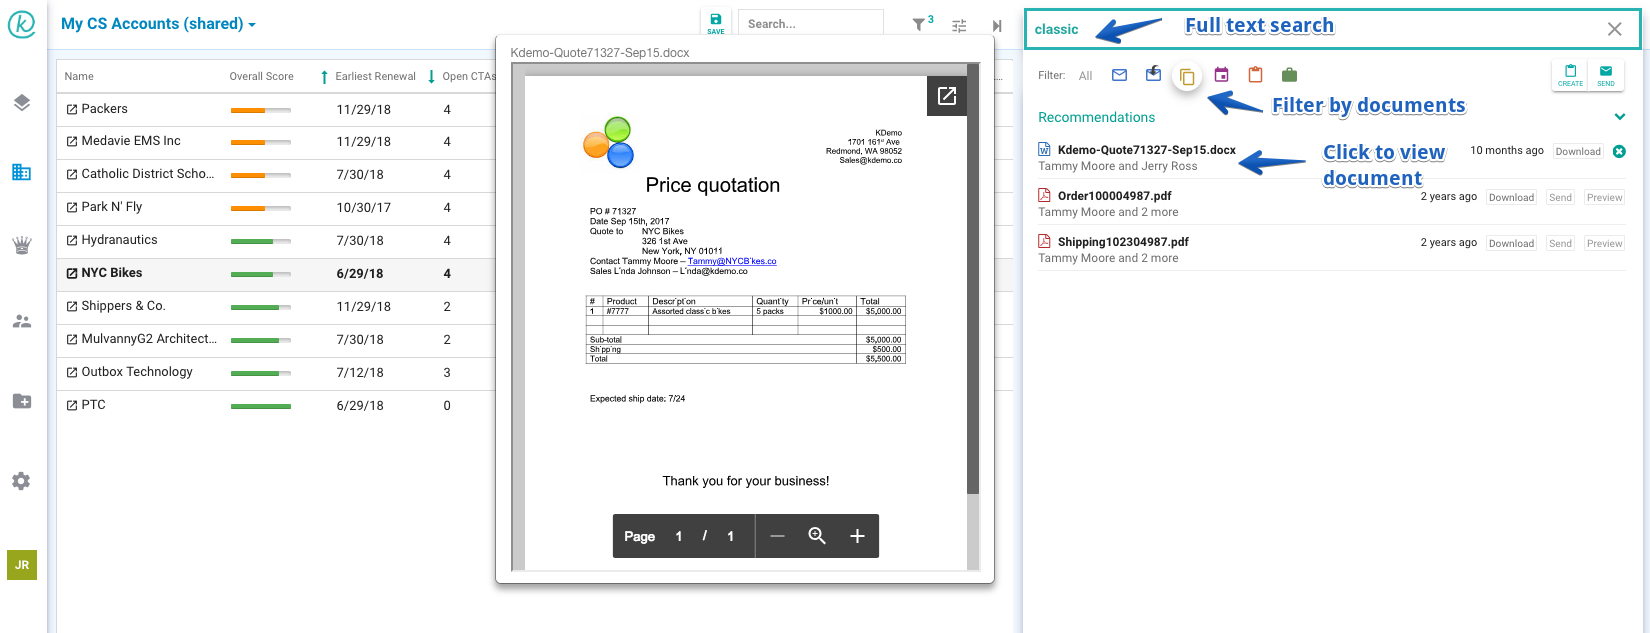
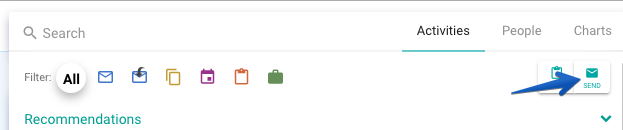
The list can easily be filtered by each of the activity categories and leverage full text search to find information.
Access control and visibility
By default, emails, meetings, attachments info will only be displayed to people that can view it in their mailbox. In other words, they were either the sender or one of the recipients. Other people will be able to view the email subject line, list of recipients and date, but will not be able to view the email body or the document content.
It is possible to change these settings and enable access to more people. For example, selected people that can view all.
3.3 Email and Capture call log
As a Customer Success manager or Account manager you’ll be able to also take action.
Send an email
ZoomInfo InboxAI will list the people that you may be interested to email to as well as proposed attachments, templates, etc. The email will be sent from your work email and will be found in your sent items folder. 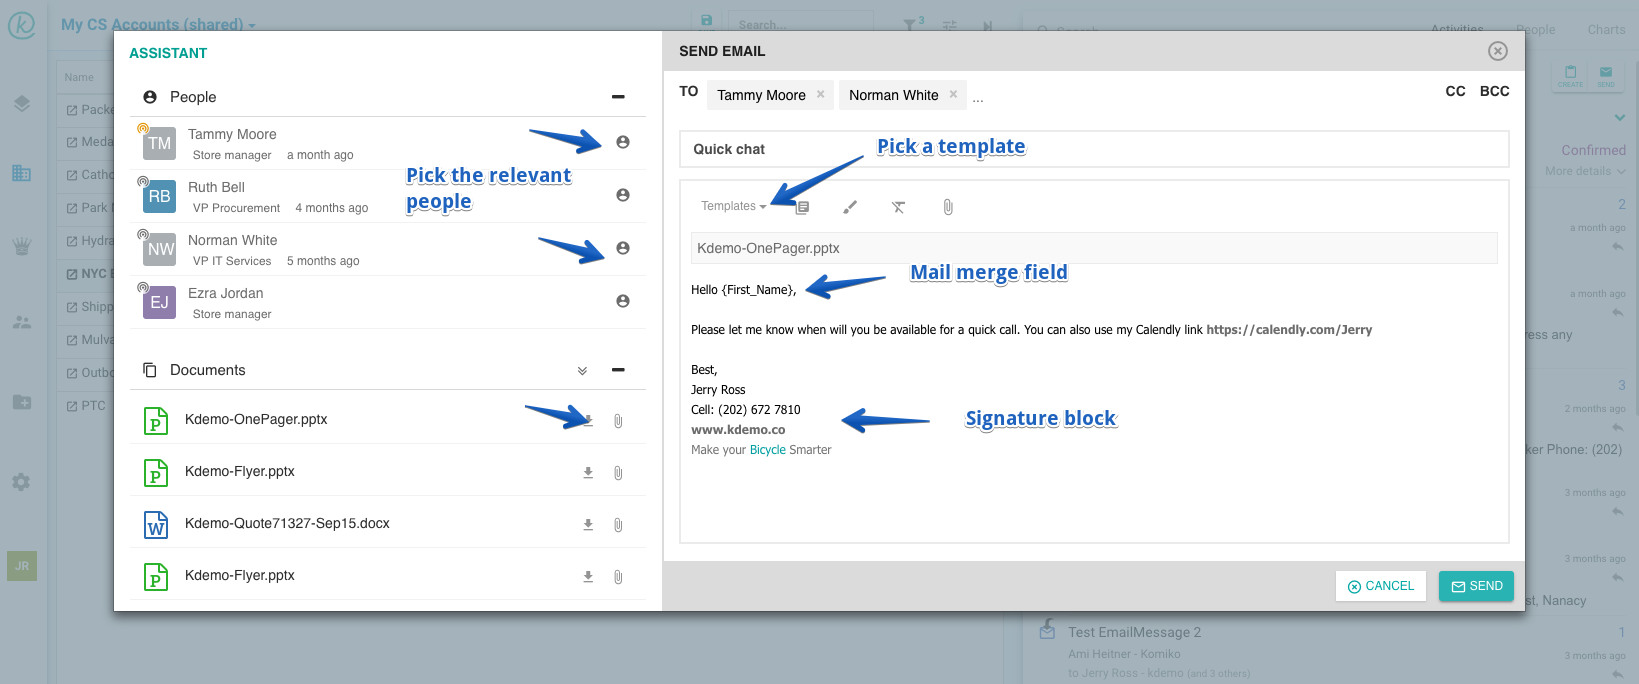
Leave A Comment?